The Fine Things are Always Hand Made
About a year ago I bought a Scott SLRM off eBay. I got it for a very good price. The shipping cost more than half what the price of the radio itself came to ! Yup, this thing is HEAVY. This thread will document my restoration of the receiver. First some shots of the radio as I received it.
She was not in too bad condition when she arrived. The plastic dial glass was gone, and the power cord was an 18 gauge piece of junk that looked like it came from a 1950s lamp, but otherwise the radio was in nice shape. Happily it came with the correct power inlet and mating connector, so replacing the power cord will be a breeze. Sadly, the radio is missing the special connector that plugs into the antenna jack. Once the external assessment was done, I went on to removing the chassis from the heavy steel cabinet in which it arrived.
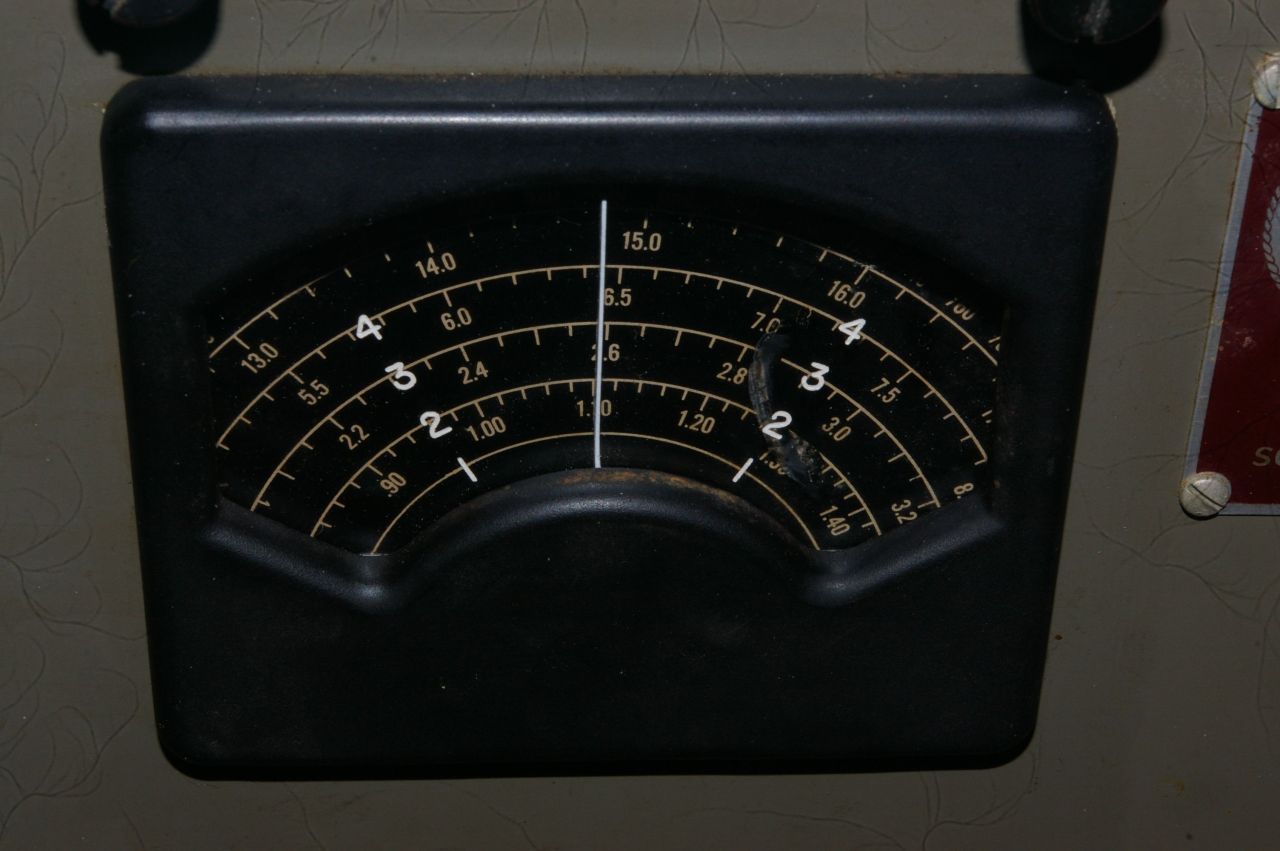
The first work I did was replace the plastic dial glass. Happily Robert F, from this site, a friend of mine from Philco Phorum, sent me one he had extra which Mike H from this site had made for him. Replacing the dial cover was not an easy task. It required removing the entire front panel of the radio. First I removed the knobs. These are SERIOUS knobs with two set screws each ! Then there were 8 screws with nuts and lock washers, and one smaller screw holding the front panel to the chassis. Two of the screws with lock washers are real bears to remove since the nuts and lock washers are buried and almost impossible to handle while turning the screw. All the others are fairly straightforward. The smaller screw goes into a standoff and was the simplest of all to remove. Happily none of the jacks or other attachments to the front panel need to be removed. There is enough free length of wire attached to them. Once the panel was off, I removed the bezel for the dial glass from the panel. It is held by 4 small screws. I then removed the dial pointer from the inside of the bezel. It is held in place by a single little screw. Behind the pointer, between it and the bezel body, I found some remains of the original plastic dial glass, all shriveled and brown. There were a few little remains of it also around 4 little brass studs around the edges of the bezel inside which help align the dial glass. I took the new dial glass and began to fit it. I had to drill the 4 holes to go over the studs, and sand the edges of the piece to just fit inside the slight recess for it in the back of the bezel. I sanded the dial pointer smooth, removing the old flaking paint on it, and repainted it white. When it was dry, I fitted the new dial glass into the bezel, and set back the dial pointer to retain it along with its little screw. This is what it looks like all finished...
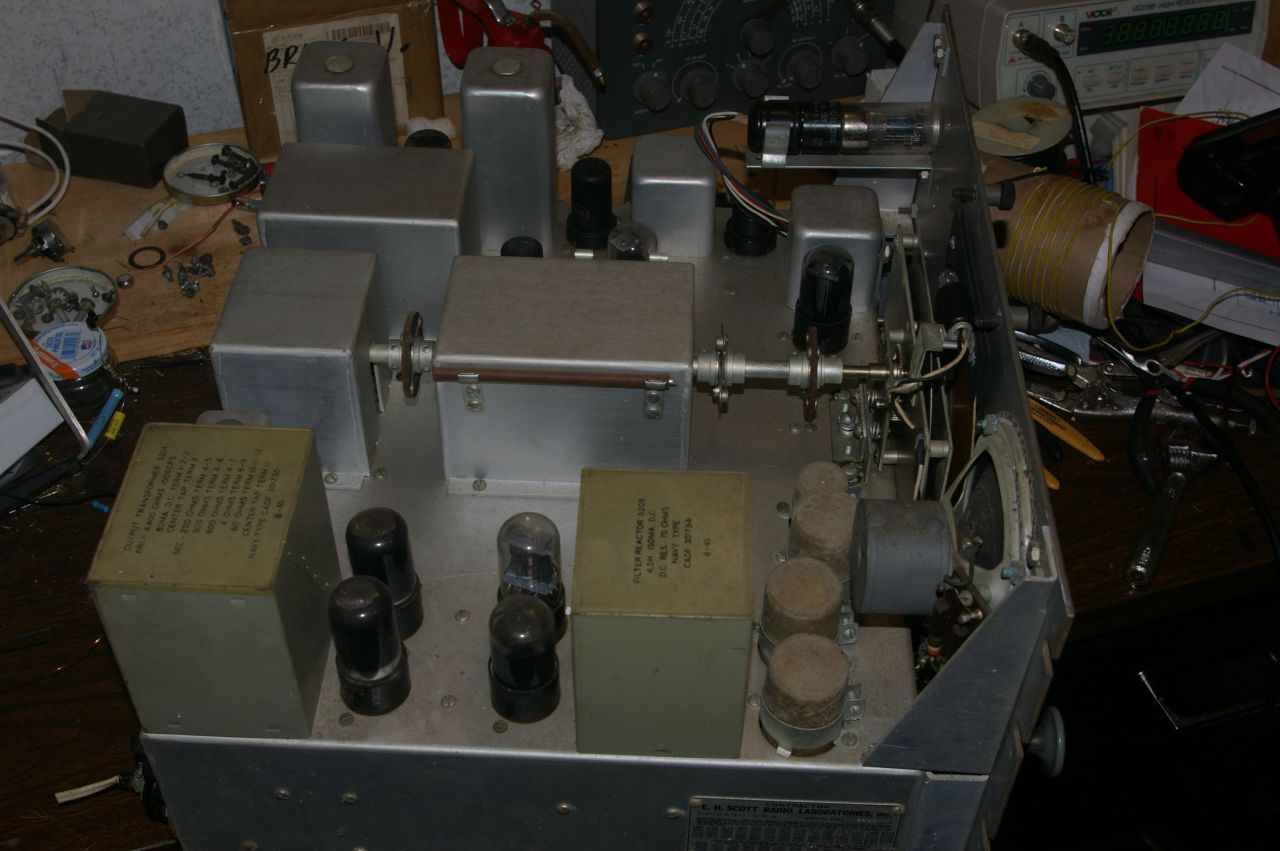
After that I removed the bottom plate of the chassis, and began my assessment of the radio. I was very happily impressed. I have never seen such a beautifully, and durably built radio since my Navy days. This radio was SERIOUSLY constructed to weather the elements at sea. I have decided to take Robert F's lead and start by just replacing the electrolytics. I will probably measure them and take good pictures of them, and see if Hayseed Hamfest can make me some replicas to use. All the paper condensers one would normally have to replace are hermetically sealed away from the elements in oil filled little metal cans, so they may well be fine for years and years. Here are pictures of the underside of the chassis before I start any work. First is an overall view, then a series of shots going from the electrolytics down that side of the chassis, then up the other side to the front, and finally the middle of the front.
 So, that is all the progress so far. I have ordered some parts and am waiting for them to come in. I have also contacted Hayseed Hamfest to see if they can make me custom replacements for the 4 electrolytic condensers along the front of the receiver. I have bought a full set of replacement condensers from them for restoring my National SW-54, and NC-125 radios. They made PERFECT replacements for the 4 wire firecracker in the SW-54, and the can in the NC-125. Fortunately, the parts list in the manual for the SLRM gives quite exact specs for these condensers, with the diameter, length, number of terminals, and so on, which I passed along as well as a JPG of the schematic. I hope they can make the new condensers for me. Stay tuned for more of this continuing adventure.
Replies to This Discussion
-
I have been exchanging emails with Hayseed Hamfest regarding making the reproduction can condensers for my Scott. I sent them the full specs for C148, C156, C157, and C158 as they appear in the parts list in the manual, as well as the JPG of the schematic and the photo I took of these four condensers from inside the chassis to show the connections. Their communication has been excellent ! The prices they quoted for making these custom can condensers were quite reasonable to my way of thinking. I am awaiting an invoice with a payment link, and hope to have these in a few weeks.
-
I have been looking to see if I could find out what sort of antenna plug mated with the unusual antenna jack on the back of my radio. I found out the original antenna plug which mates with the connector on the back of this radio is a Navy type 49121 connector.
 These are now virtually unobtainable, so, although it may upset the purists, and it pains me to do it, I am going to replace the original connector with an SO-239. The mate for these, the PL-259 is readily available, and these types have been standard antenna connectors for years.
-
I don't have much more to do on this radio until I get the new electrolytics for it. I put the cover back over the antenna inlet section and tested the tubes. They were all OK. I think most were the original tubes since they had the JAN numbers and markings and the military as well as civilian tube numbers. Wednesday, when I go into Morristown I am going to buy a cheap 18/3 SJT extension cord to connect to the power inlet connector. That is about the last thing I will have left to do before I do the electrolytics.
-
It does say you need to have the "hot" side of the AC line to pin #1. I'd use a polarized plug and wire carefully to be sure it is set up that way. That still means you must trust the wiring where you plug it in - that's easily checked with a plug tester. Wired correctly, it should be safe to operate without an isolation transformer.
Kent
-
Yup, Kent. I plan on using a 3 wire plug, and wire the "hot" blade to 1, and neutral blade to 3, and ground blade to 2. I'm going to buy a cheap 3 wire extension cord and use that, cutting off the female end. I will ring it out carefully just to be sure that it is wired correctly, hot to black, neutral to white, and ground to green.
-
Today when I was in Morristown I went by Harbor Freight and bought a cheap 16 gauge 3 wire extension cord. I cut off the female end, and wired it to the plug which mates with the power inlet, the original, and checked to make sure it was wired correctly, that the black lead did indeed go to the "hot" blade for the wall outlet, the white to the neutral, and the green to the grounding pin. I then wired it as the manual says to, with the hot to terminal one of the connector, the neutral to pin 3, and the ground to pin two.
-
Great - I'd still double check the wall outlet to be sure it is wired right. In most newer homes today, it isn't a problem, but I saw a house built in the late 80s that had a couple outlets wired incorrectly - you never know. Let us know how the set does when you get done!
Kent
Michael Lawton said:Today when I was in Morristown I went by Harbor Freight and bought a cheap 16 gauge 3 wire extension cord. I cut off the female end, and wired it to the plug which mates with the power inlet, the original, and checked to make sure it was wired correctly, that the black lead did indeed go to the "hot" blade for the wall outlet, the white to the neutral, and the green to the grounding pin. I then wired it as the manual says to, with the hot to terminal one of the connector, the neutral to pin 3, and the ground to pin two.
-
Tonight, just for fun, and to chase away some boredom, I replaced the two "dead man" condensers which go across the power inlet to ground. I removed the double condenser can which held them and replaced it with two new Y condensers on a 3 terminal strip. Afterward I tested the old condensers and found they are reading almost EXACTLY what they are supposed to be. This makes me feel better about all the rest of the "paper" condensers in the set, all of which are hermetically sealed in oil filled cans as these were. I would like to leave them as is. Anyway, here's what the new condensers look like installed, compare the picture to The one I posted earlier of that end of the receiver.
-
As I recall, I changed the caps in the tub with X1Y2 caps. After a lot of testing, I believe I left all of the other bathtub caps alone. The radio still works great.
© 2026 Created by Kent King.
Powered by
![]()


